OpenHarmony development-connect development board to debug applications

In the OpenHarmony development process, connecting the development board for application debugging is a key step. Only in a real hardware environment can we test more potential problems in the application so that we can optimize it later. This article details the steps to connect the development board to debug OpenHarmony applications.
First, we set up the OpenHarmony development environment and installed the OpenHarmony SDK and required drivers. Next, we connect the development board to the development machine via USB connection. After the connection is successful, we use DevEco-Studio to deploy and start the application. By monitoring the running status of the application on the development board, we can use the log output to diagnose problems.
1. Set up the OpenHarmony development environment
We have already introduced how to build a HarmonyOS application development environment from scratch. Here is just a brief review. For the detailed process, please refer to my previous article: HarmonyOS application development-building a development environment
1. Install DevEco Studio
Official website: HUAWEI DevEco Studio and SDK download and upgrade | HarmonyOS developers Download the latest version of DevEco Studio 3.1.1 Release.
After the download is completed, click Install and select the installation path according to your own preferences. 2GB of storage space is required.
Remember to check "Generate shortcut" and "Add to path environment variable".
 HarmonyOS application development-Building a development environment-Hongmeng Developer Community
Continue Next until the installation is completed.
 HarmonyOS application development-Building a development environment-Hongmeng Developer Community
After installation, you need to restart your computer.
2. Install Node.js and ohpm
When you run DevEco Studio for the first time, you will come to this page.
HarmonyOS application development requires Node.js and ohpm (the package management tool of the Hongmeng ecological third-party library) to be installed on our computers.
Huawei officially provides images here. If they have not been installed on this machine before, just check install and then take the next step.
 HarmonyOS application development-Building a development environment-Hongmeng Developer Community
3. Install HarmonyOS SDK
After installing the basic components, we need to install the HarmonyOS SDK. HarmonyOS SDK provides a series of system open capabilities required for application and service development, including framework, Ability, distributed services, security, Ark compiler, HMS Core, basic software services, hardware services, etc.
Just select the installation path here. I just default to the path and click Next.
 HarmonyOS application development-Building a development environment-Hongmeng Developer Community
This page displays all the packages that need to be installed. Click Next to install.
 HarmonyOS application development-Building a development environment-Hongmeng Developer Community
The installation is completed after a few minutes.
2. Develop OpenHarmony applications
We have already introduced how to develop a HarmonyOS application from scratch. Here is just a brief review. Please refer to my previous article for the detailed process: HarmonyOS application development-quickly develop an application using low code
1. Create Stage mode application
When creating, we need to select a model. There are two types of models, one is the FA model and the other is the Stage model. API 8 and earlier interfaces are provided based on the FA model; starting from API 9, OpenHarmony mainly promotes the Stage model. Here we create using Stage mode and check the low-code development mode.
 HarmonyOS application development-Building a development environment-Hongmeng Developer Community
After creating it, we enter the project development interface.
2. Low-code development applications
Referring to the steps in my previous article, we will soon be able to make a simple application using low code.
 HarmonyOS application development-Building a development environment-Hongmeng Developer Community
After the code is completed, we can use the simulator that comes with DevEco Studio for debugging.
Add the simulated device and click Start.
 HarmonyOS application development-Building a development environment-Hongmeng Developer Community
The simulator debugging effect is as follows:
 HarmonyOS application development-Building a development environment-Hongmeng Developer Community
Make sure our HarmonyOS application can run in the simulator, and then deploy it directly on the development board.
3. Install OpenHarmonyOS on the development board
First confirm whether the development board has pre-installed the OpenHarmony system. If not, we need to burn the OpenHarmony system to the development board ourselves.
We have already introduced how to burn the OpenHarmony system to the development board from scratch. Here is just a brief review. For the detailed process, please refer to my previous article: OpenHarmony Development - Burning the OpenHarmony System to the Development Board
The development board we use for this demonstration is Hongcheng Zhiyuan HCPAD-100, which is an artificial intelligence development board designed based on Rockchip RK3568. Other development boards, such as RK3568 or HiHope DAYU200, are also available.
1. Preparation
Hardware preparation:
- RK3568 development board (or HCPAD-100 development board, HiHope DAYU200 development board, etc.)
- Dual USB port data cable
- Power adapter, etc.
Software preparation:
- Get the source code for OpenHarmony.
- Prepare RK3568 burning tool, such as RKDevTool.
- Install and configure the development environment, such as ensuring a suitable compilation tool chain.
2. Download the RK driver and burning tool
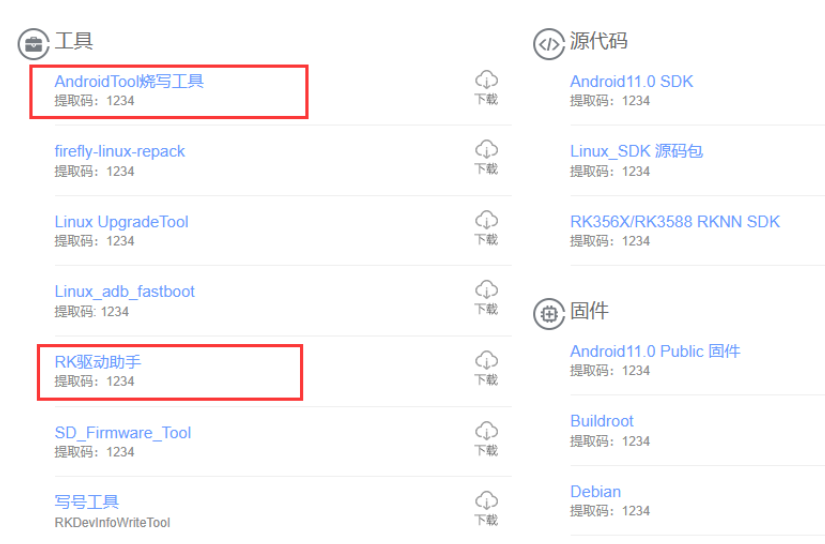
Download the RK driver assistant and AndroidTool burning tool.
Address: Firefly | Make technology simpler and life smarter (t-firefly.com )
 OpenHarmony Development-System Burning-Hongmeng Developer Community
Install after the download is complete.
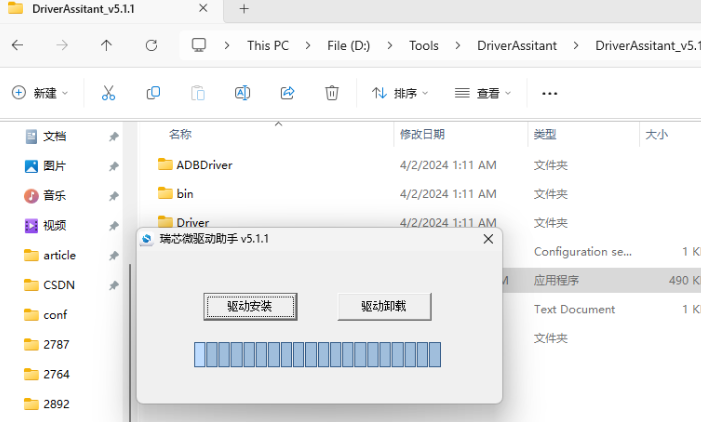
① Install RK driver assistant
Double-click the installer and select driver installation. After the installation is completed, the computer can only recognize it when it is connected to the development board.
 OpenHarmony Development-System Burning-Hongmeng Developer Community
② Install AndroidTool burning tool
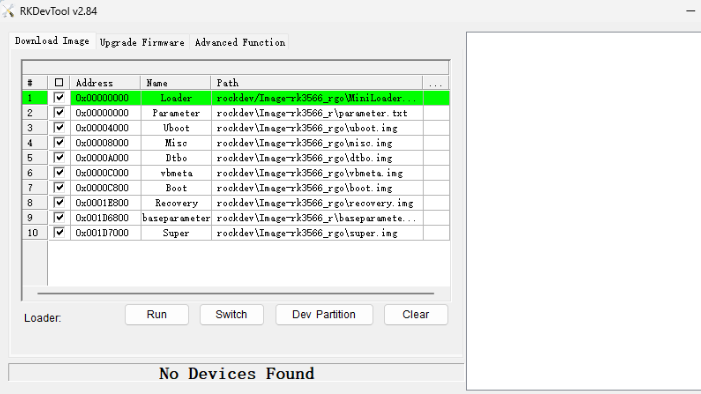
Select the installation path to install. After the installation is completed, open it as follows. No Devices Found is displayed when no device is connected.
 OpenHarmony Development-System Burning-Hongmeng Developer Community
3. Download the HDC command tool
HDC (OpenHarmony Device Connector) is a command line tool provided for developers for device connection debugging. The PC development machine uses the command line tool hdc_std for debugging. This tool supports deployment on Windows/Linux/Mac and other systems with OpenHarmony devices. (or simulator) for connection debugging communication.
You can download it from the official or community link. The compressed package contains both Windows and Linux versions.
Download link ①: https://repo.huaweicloud.com/harmonyos/os/3.2-Release/ohos-sdk-windows_linux-public.tar.gz
Download link ②:
developtools_hdc_standard : Device debug connector that provides the device connection capability and a command line tool | Device debug connector, provides the ability to connect devices, and provides an external command line tool
Download link ③:
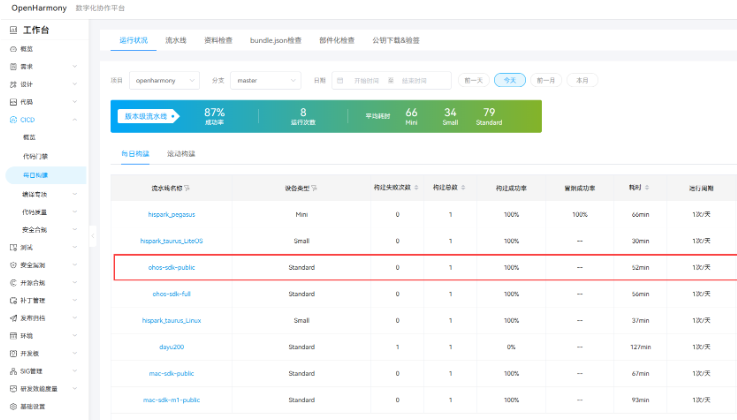
Visit: Daily Builds | OpenHarmony CI
 OpenHarmony Development-System Burning-Hongmeng Developer Community
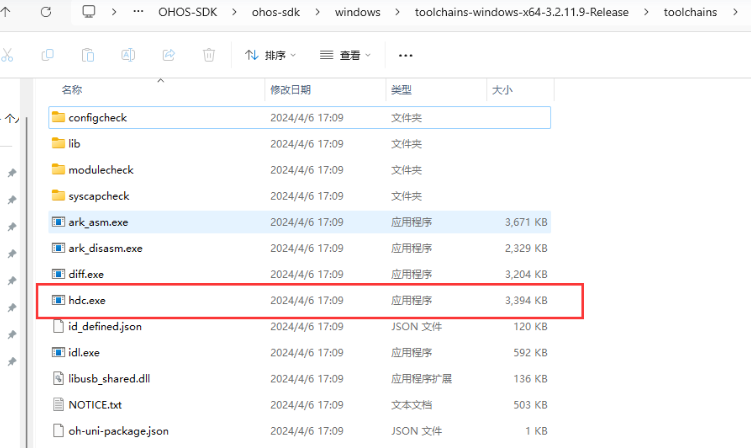
After downloading, unzip it, enter the directory ohos-sdk\windows, and continue to unzip the compressed package starting with toolchains-windows.
Find hdc.exe in the \toolchains directory of the folder starting with toolchains-windows after decompression.
 OpenHarmony Development-System Burning-Hongmeng Developer Community
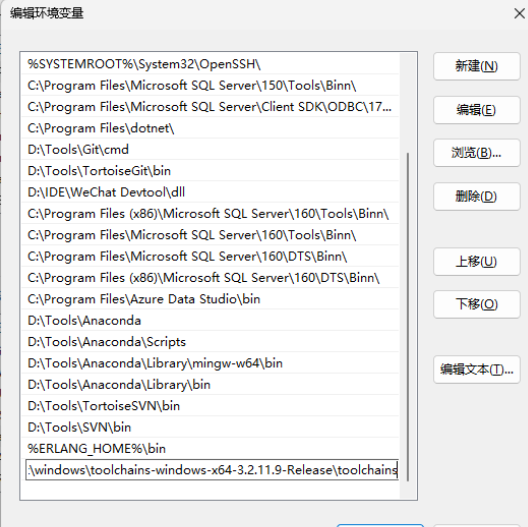
Configure environment variables and configure the path of hdc.exe into path.
 OpenHarmony Development-System Burning-Hongmeng Developer Community
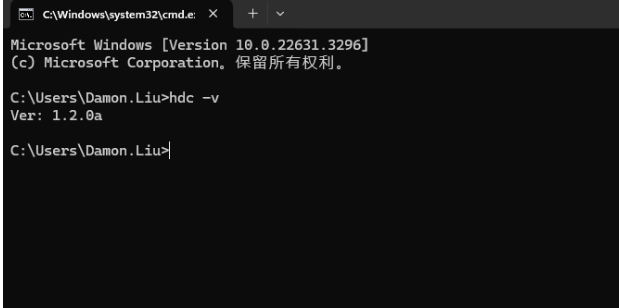
Verify whether HDC is installed successfully, use the command to view the version
hdc -v- 1.
 OpenHarmony Development-System Burning-Hongmeng Developer Community
You can see that HDC is installed successfully.
4. Connect the computer and development board
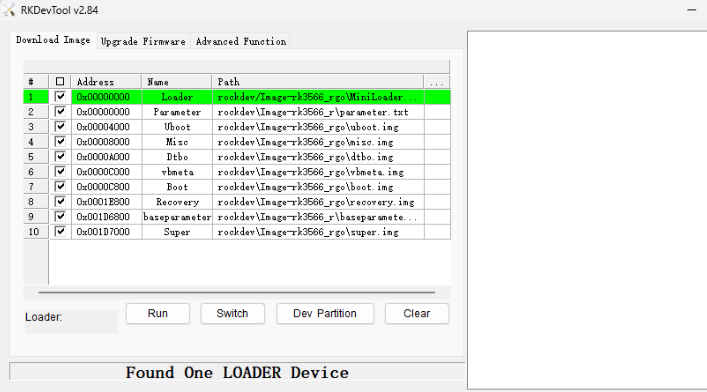
When the development board is powered off, press and hold the burning button, connect the computer and the development board through dual USB data cables, and then power on the development board. At this time, the development board enters the burning mode.
 OpenHarmony Development-System Burning-Hongmeng Developer Community
 OpenHarmony Development-System Burning-Hongmeng Developer Community
5. Download the OpenHarmony image
Visit: Daily Builds | OpenHarmony CI
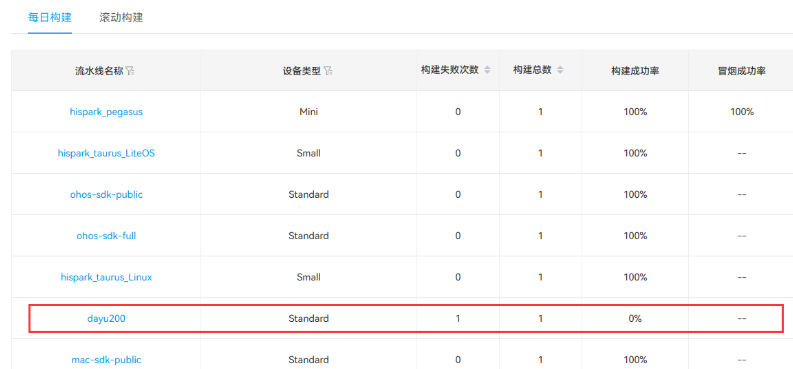 OpenHarmony Development-System Burning-Hongmeng Developer Community
6. Burn the OpenHarmony system
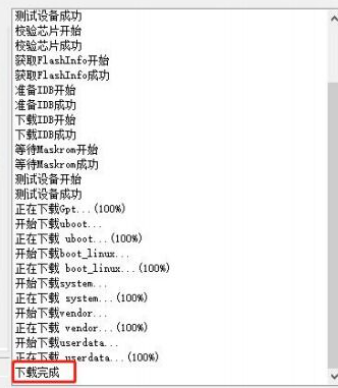
After the image download is completed, we need to import the image configuration into the burning tool. Right-click Loader to import the configuration and select the config.cfg file in the decompressed image package. After importing the new configuration, the misc, sys-prod, and chip-prod partitions do not have images and cannot be checked during programming. Click Execute, and if the download is completed, it means the burning is successful.
 OpenHarmony Development-System Burning-Hongmeng Developer Community
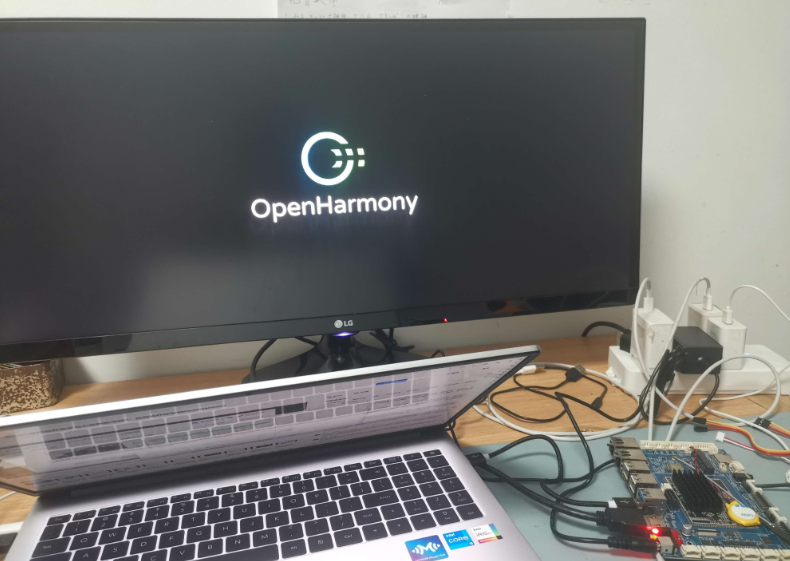
After the burning is completed, we power off the board and plug it back in. The board boots up and enters the OpenHarmony system page.
 OpenHarmony Development-System Burning-Hongmeng Developer Community
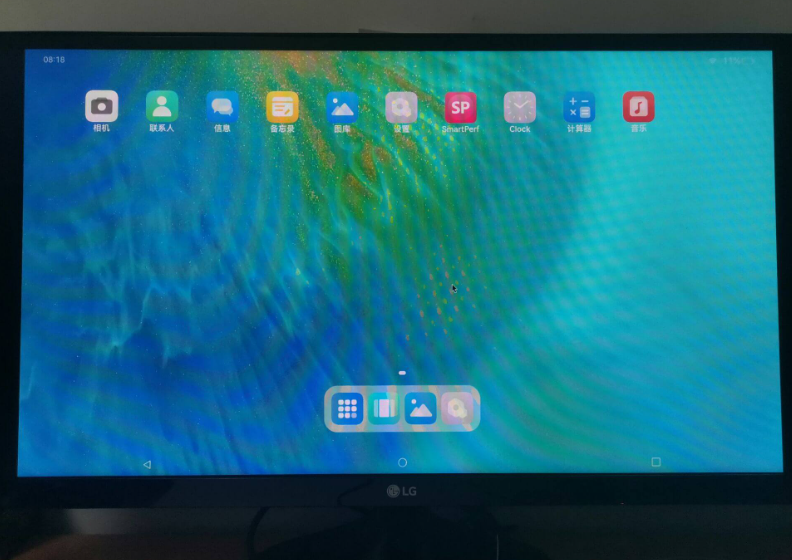
After booting is complete, you can see the system applications that come with OpenHarmony.
 OpenHarmony Development-System Burning-Hongmeng Developer Community
At this point, the steps of burning the OpenHarmony system to the development board are completed.
4. Connect the development board to debug the application
1. Download the OpenHarmony SDK
To jointly debug DevEco-Studio and OpenHarmony systems, you need to download the OpenHarmony SDK. If you have downloaded it before, you only need to import the path. If you have not downloaded it before, you can download it directly in DevEco Studio.
Let’s first open the settings of DevEco Studio.
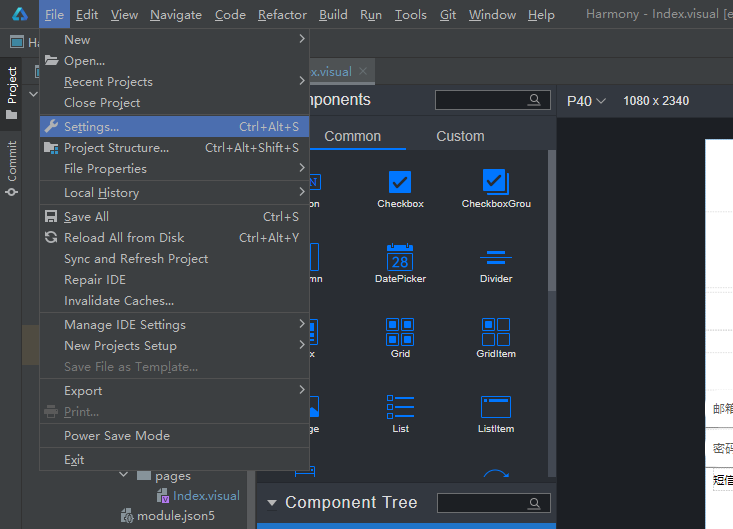
Add a path to OpenHarmony-SDK, or download the OpenHarmony SDK directly.
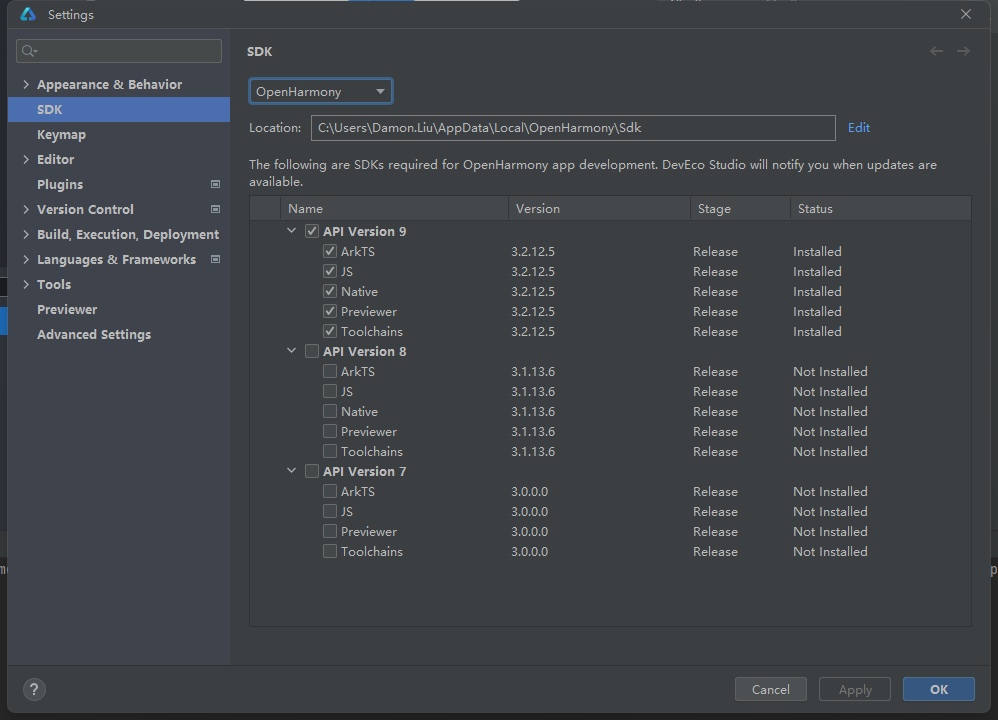
I haven't installed it here, so I downloaded it directly.
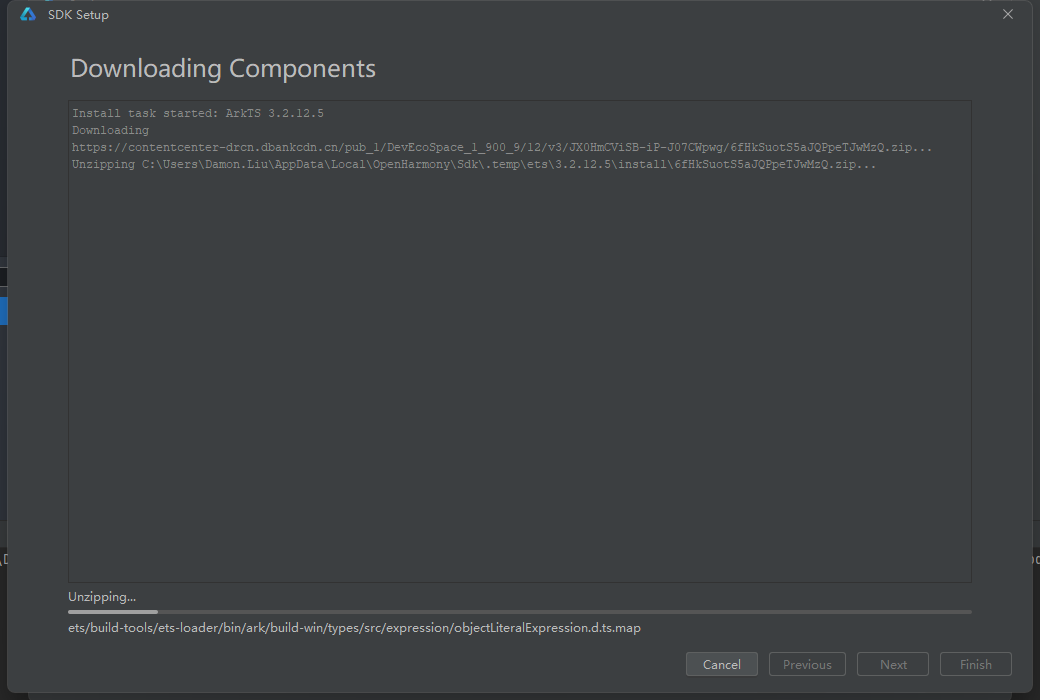
In about two minutes, the download progress bar reaches the end, and our OpenHarmony-SDK installation is completed.
2. Connect development equipment and development board
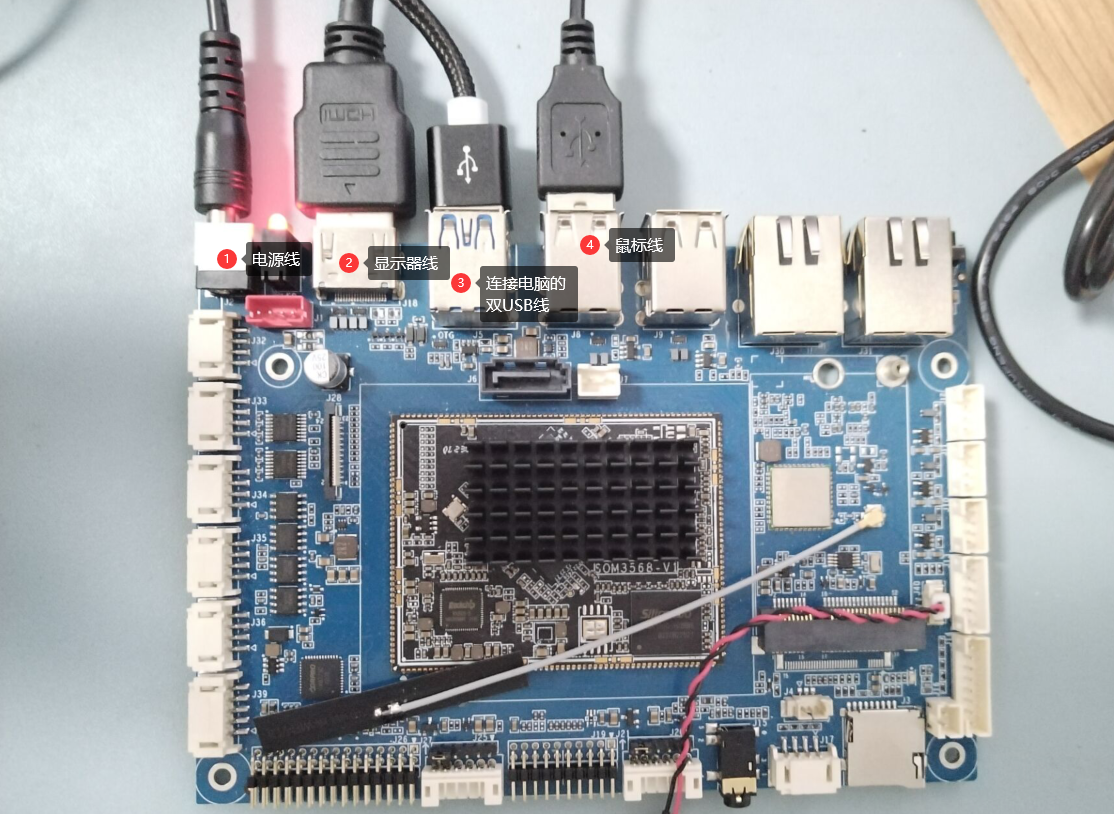
We connect the power supply to the development board, connect the monitor and mouse, and then connect the USB to our computer.
After the connection is successful, our device name can be seen above DevEco-Studio. If the cable is not plugged in properly, No Devices will still be displayed.
3. Set project signature
We need to set a signature for the project before we can conduct joint debugging with the development board.
Connect the device. After the device name appears above (the picture was taken early, it should show the device name), click the project structure button in the upper right corner. Select Signature Settings to enter the Signature Settings page.
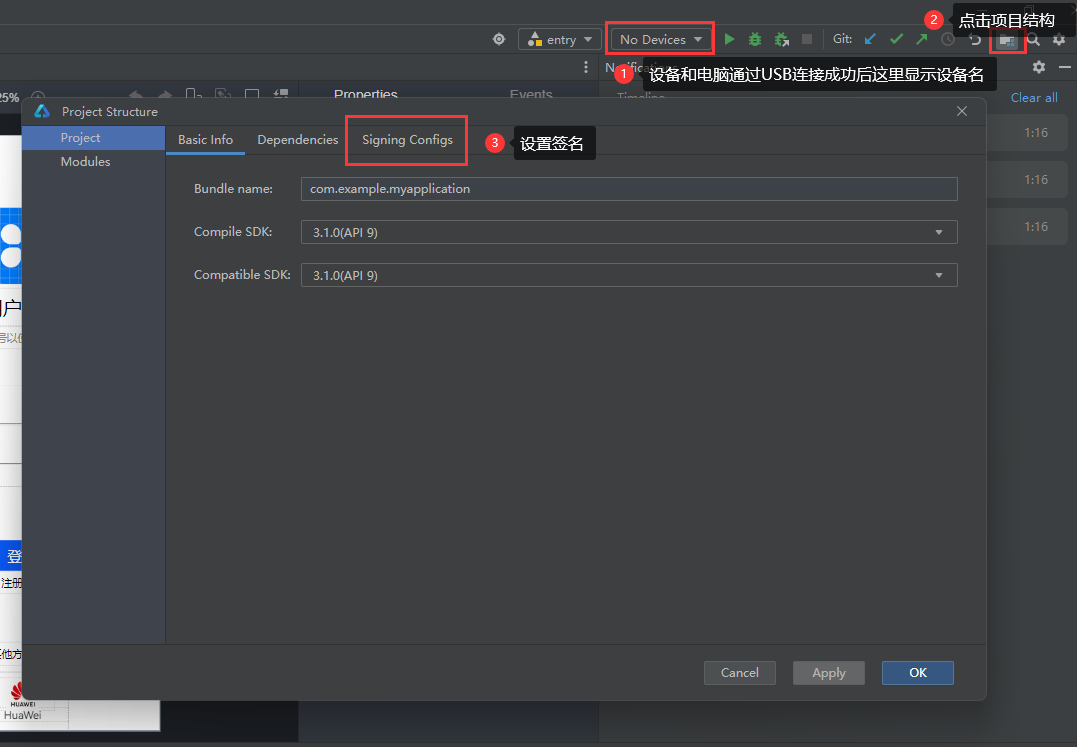
Check the box in the signature settings to automatically generate a signature.
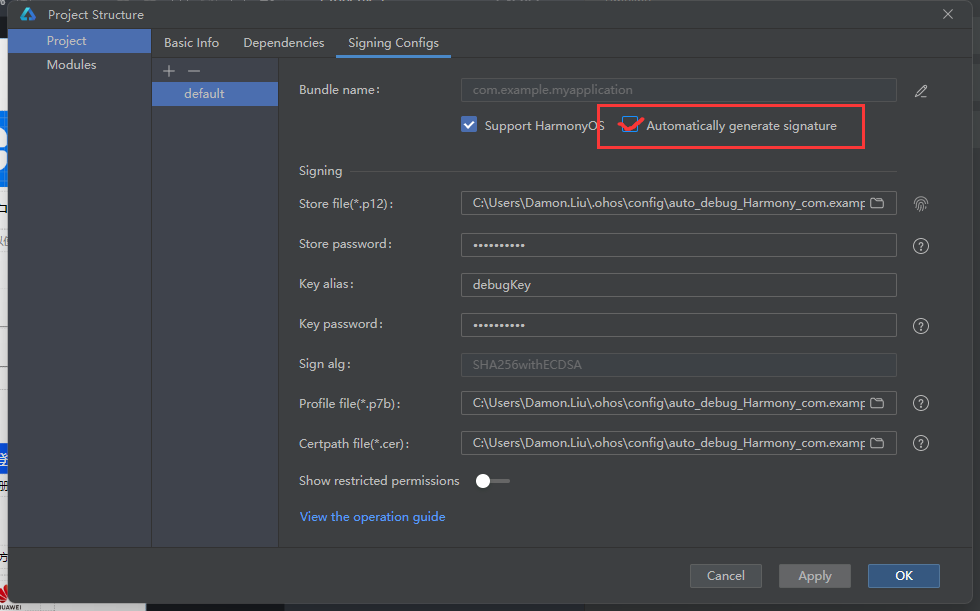
If you are not logged in to a Huawei Cloud developer account, we will be prompted to log in first.
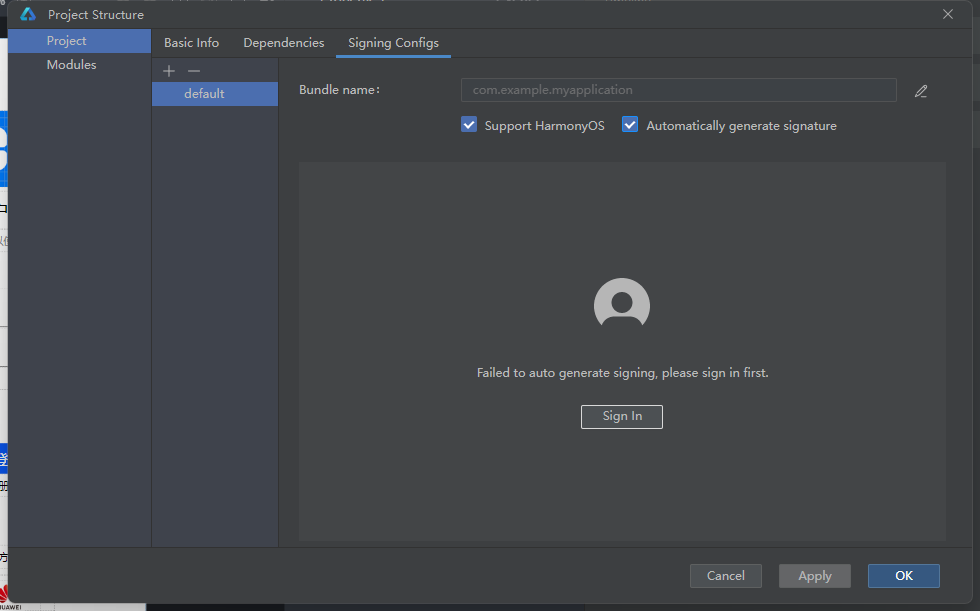
Click to log in, and the browser will pop up automatically. Just log in with your Huawei account.
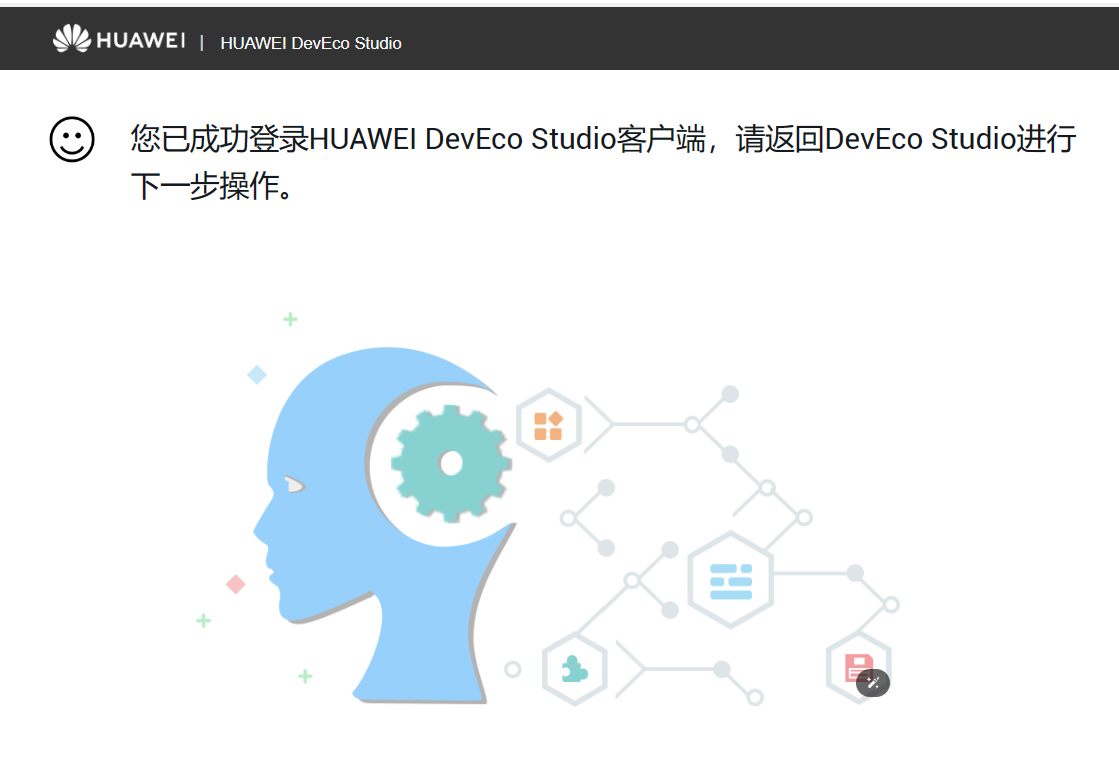
After the login is completed, return to our DevEco Studio client.
4. Start the DevEco-Studio project
Just click the run button.
You can see that our development board automatically installed and ran the HarmonyOS application we just developed.
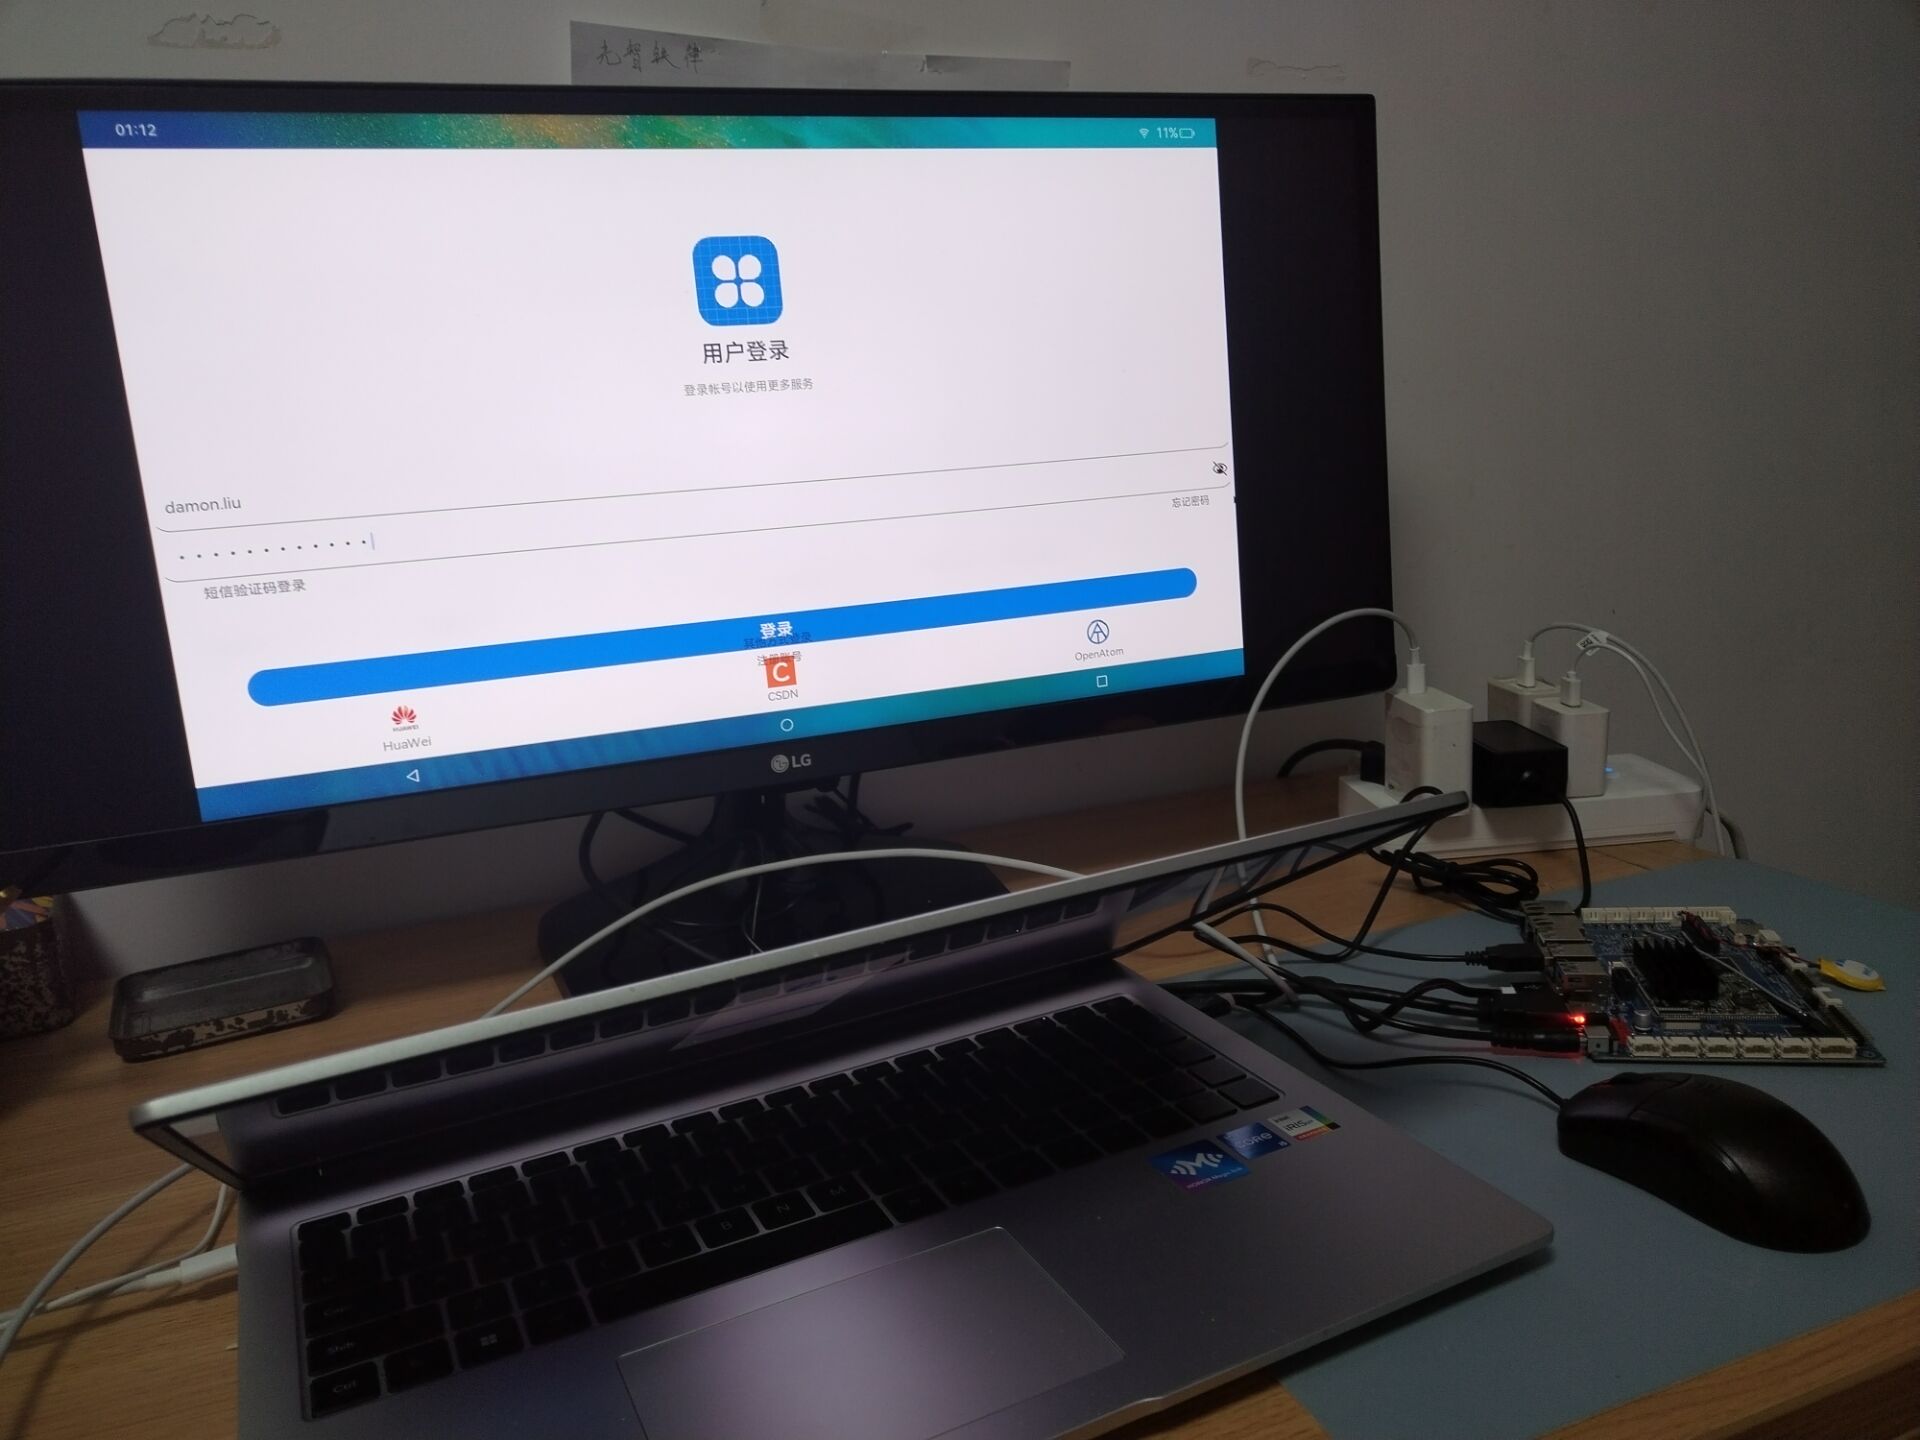
The APP is also displayed on the home page.
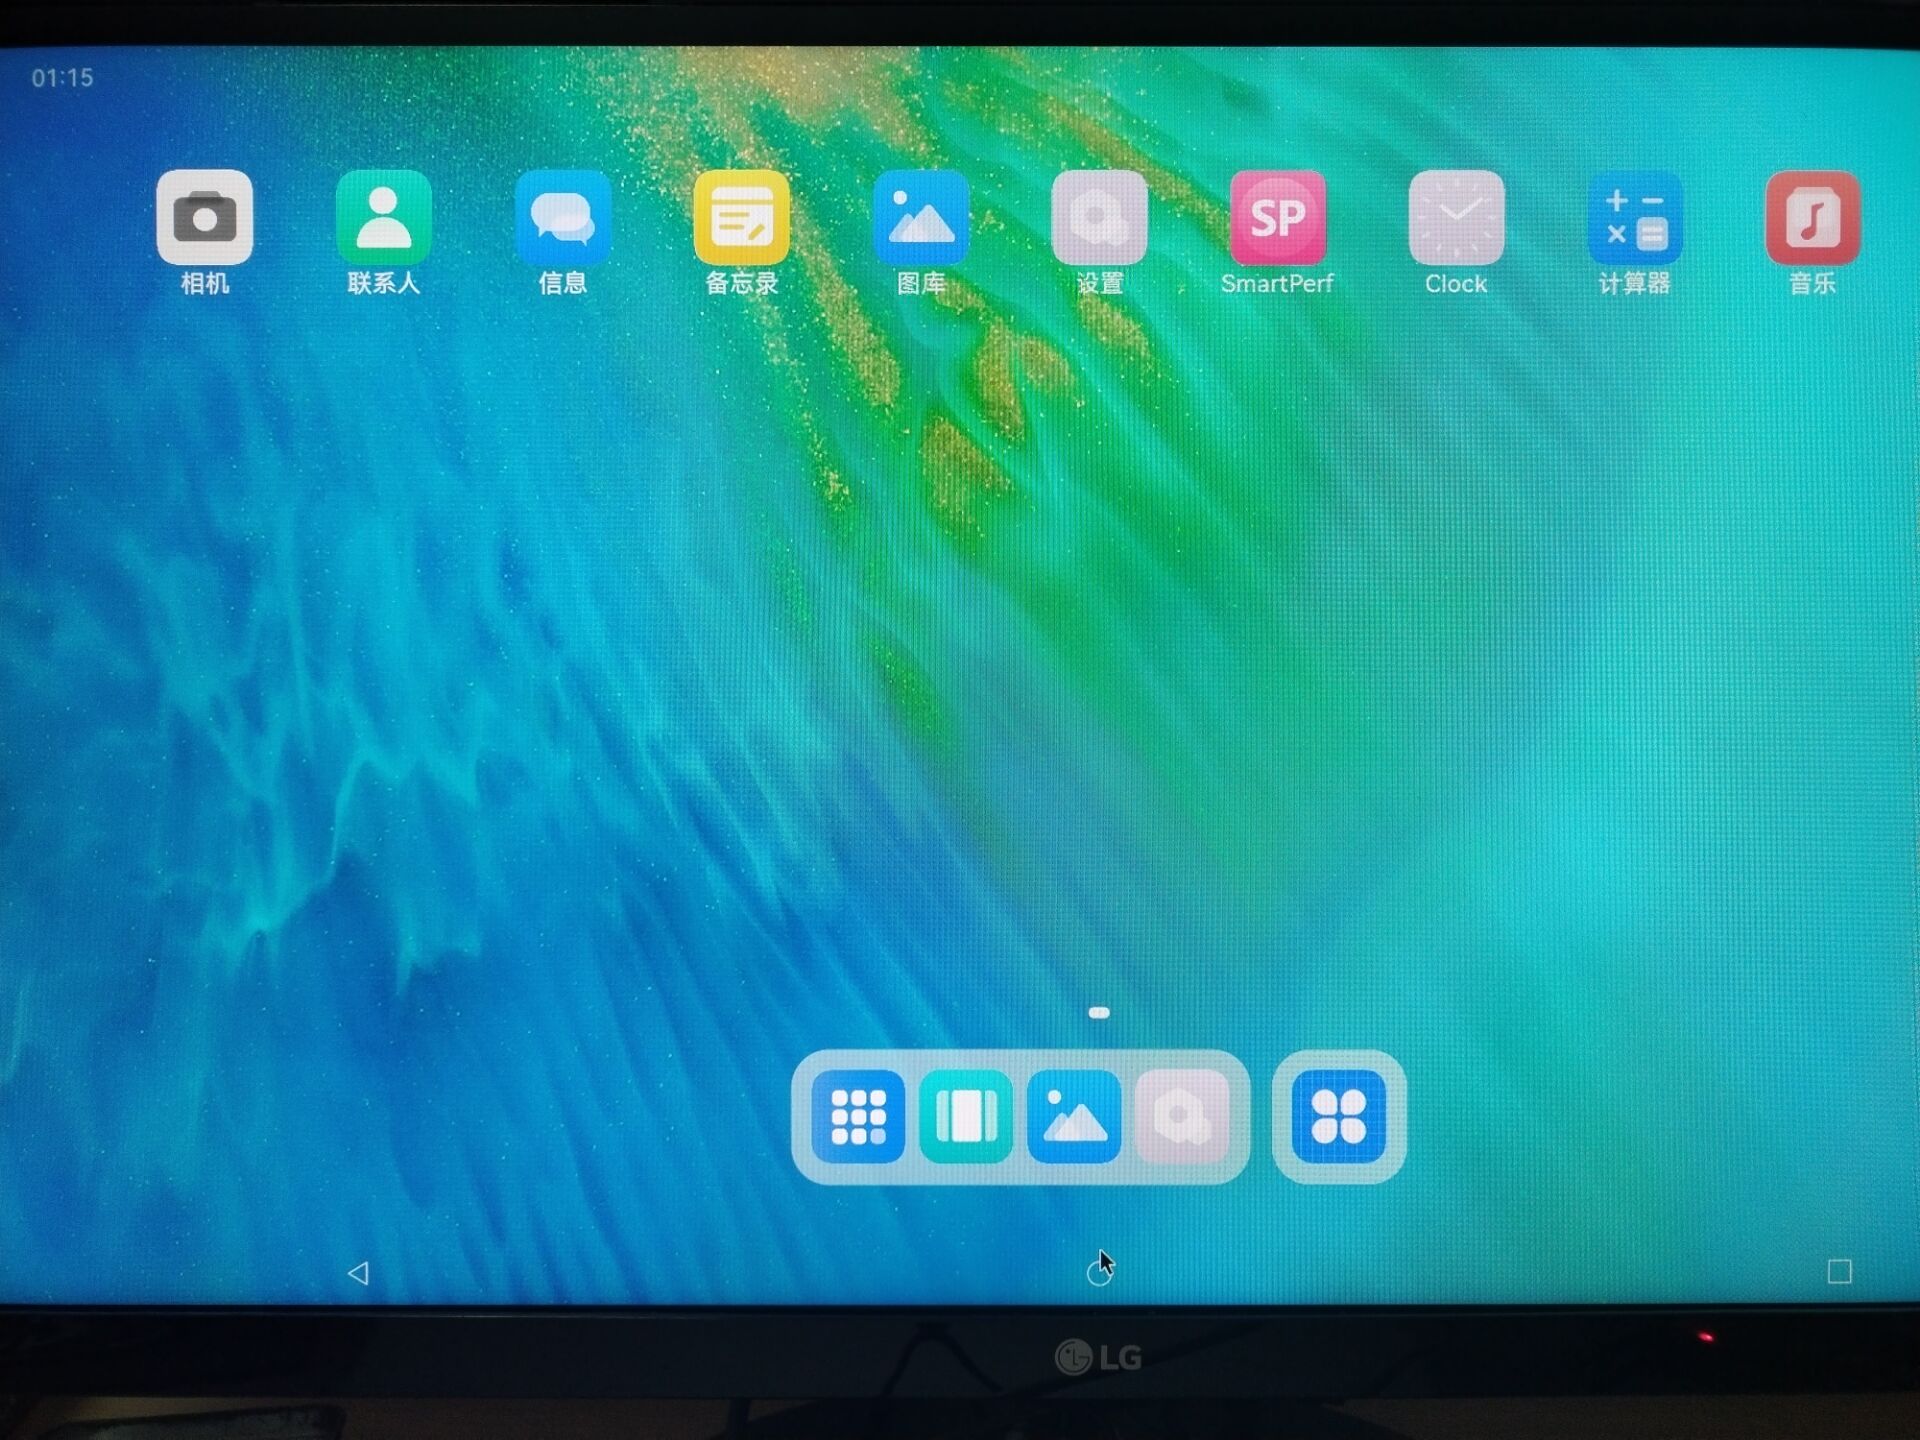
At this point, I have successfully completed the deployment of the OpenHarmony environment, application development, development board burning and production equipment joint debugging. I hope this article can answer your questions and solve the difficulties encountered in development.