Next.js實現國際化方案完全指南

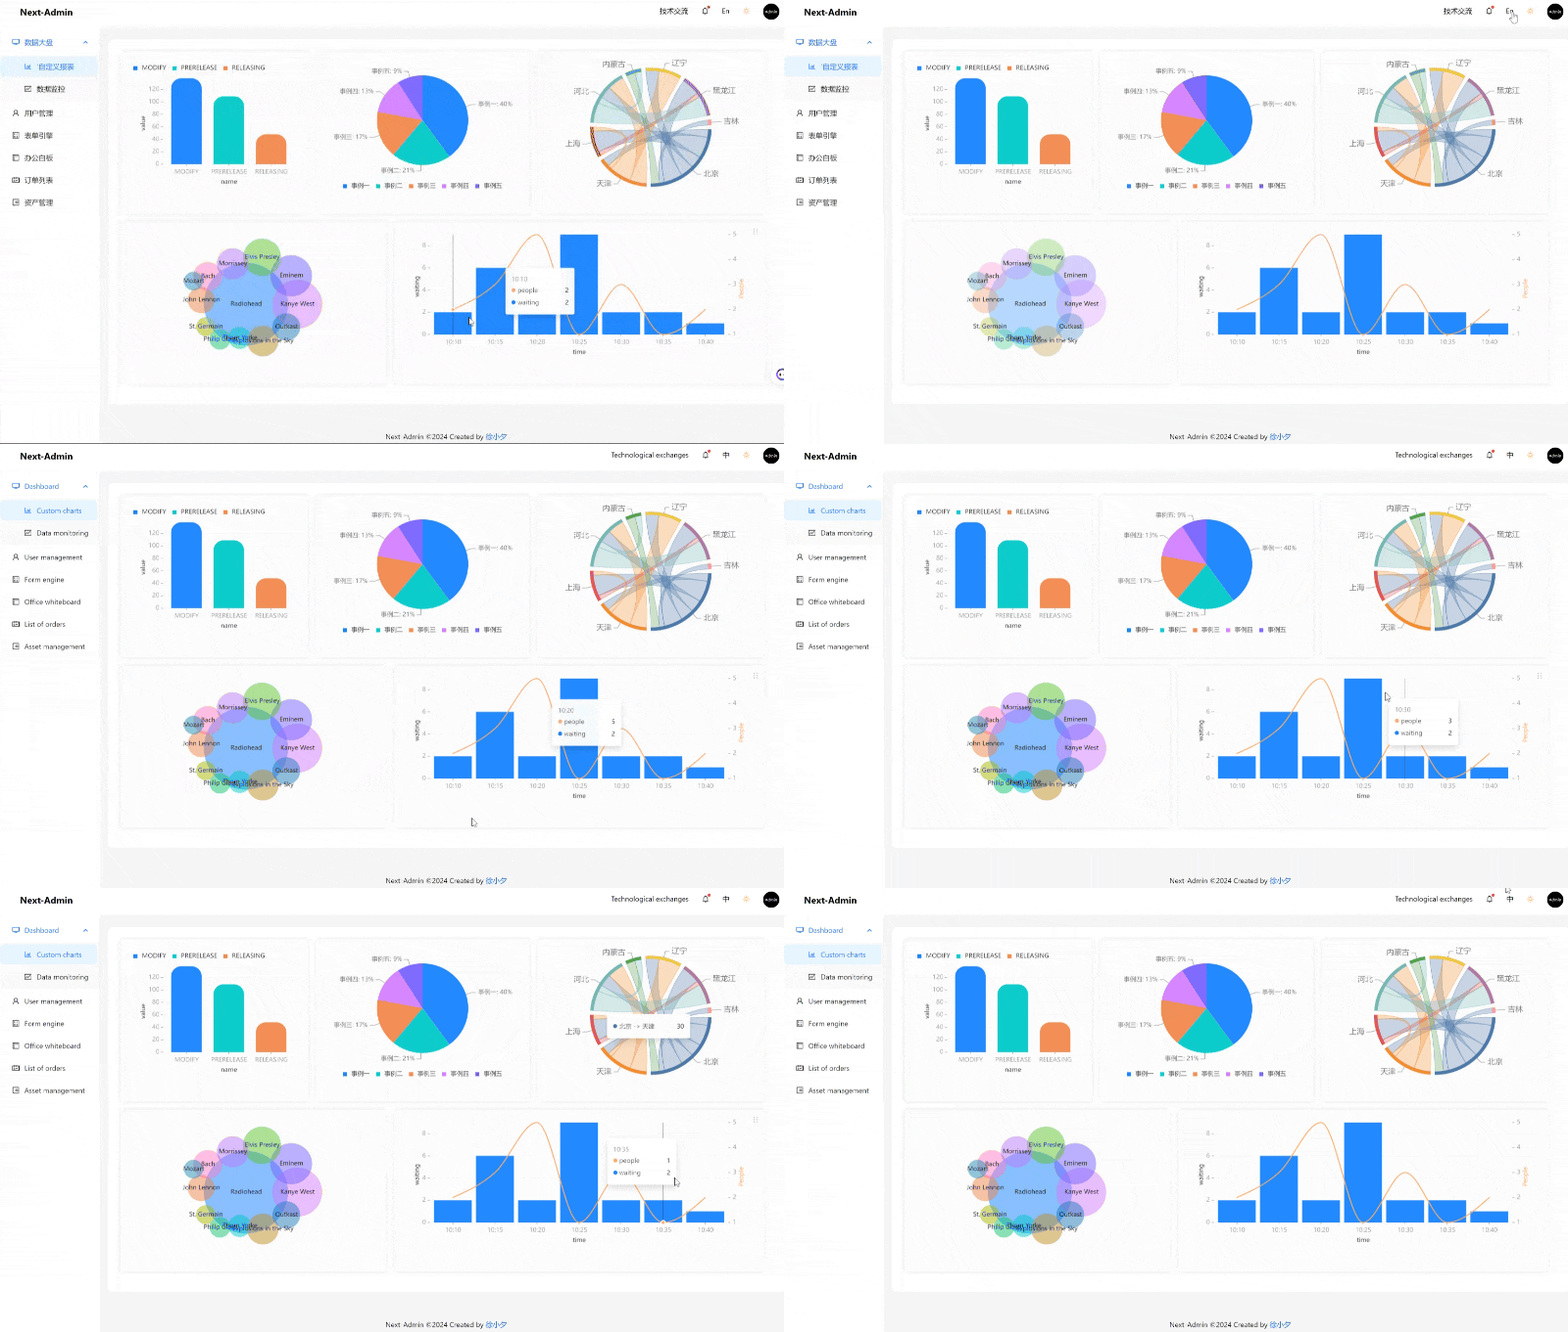
最近 Next-Admin 中後台管理系統已經支援國際化,接下來就跟大家分享一下實現國際化的詳細方案,方便大家輕鬆應用到自己的專案。
github網址:https://github.com/MrXujiang/next-admin
演示網址:http://next-admin.com
內容大綱
- Next-Admin 基本介紹
- Nextjs 國際化常用方案
- 從零實現 Nextjs 國際化方案
- Next-Admin 後製規劃
Next-Admin介紹
 圖片
圖片
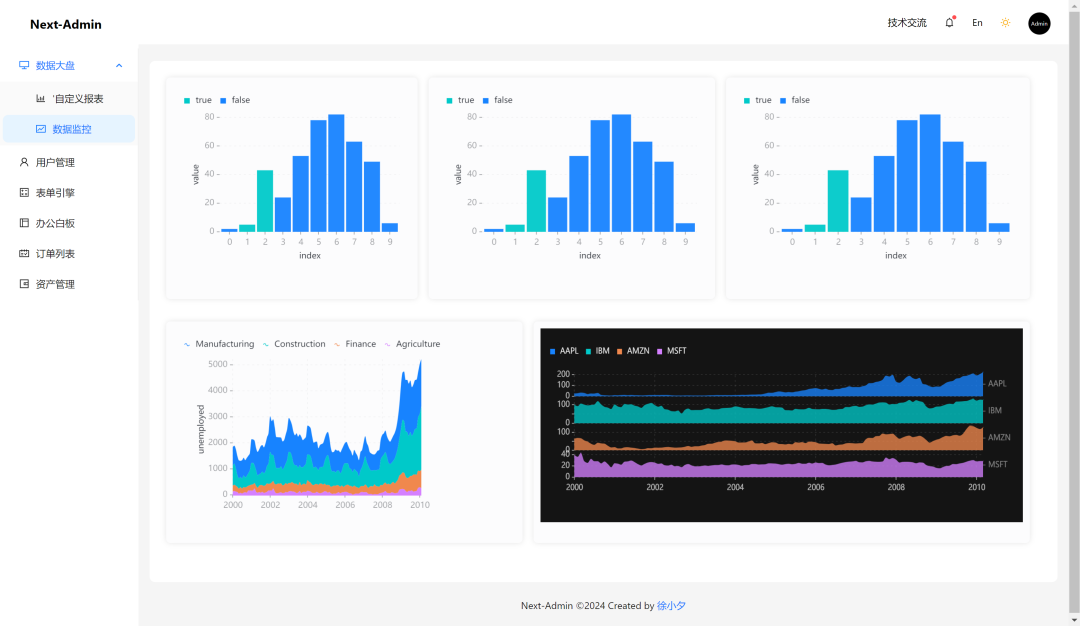
Next-Admin 是一款基於nextjs最新版+ Antd5.0的開源中後台(同構)系統,我們使用它可以輕鬆實現前後端同構項目,支援SSR和CSR,具體特點如下:
- Next14.0 + antd5.0
- 支持國際化
- 支援主題切換
- 內建數據視覺化報表
- 開箱即用的商業頁面模板
- 支援自訂拖曳看板
- 整合辦公白板
- Next全端最佳實踐
- 支援行動端和PC端自適應
Nextjs 國際化常用方案
 圖片
圖片
Next.js 的國際外掛程式有很多,以下是其中一些常用的:
- next-i18next: 一款流行的 Next.js 國際化插件,它提供了豐富的功能,包括多語言路由、伺服器端渲染和靜態生成的支持,以及簡單的翻譯文件管理。
- next-intl: 用於 Next.js 的國際化插件,它提供了基於React Intl的國際化解決方案,支援多語言文字和格式化。
- next-translate: 這個外掛程式為 Next.js 提供了簡單的國際化解決方案,支援靜態生成和伺服器端渲染,並且易於配置和使用。
在親自體驗了以上幾款插件之後,我選擇了 next-intl, 從擴展和使用靈活性上都非常不錯, 接下來就和大家分享一下如何使用 next-intl 來實現 Next 項目國際化.
從零實現Nextjs 國際化方案
 圖片
圖片
1. 首先我們先安裝 next-intl :
pnpm add next-intl- 1.
2. 在 Nextjs 專案根目錄中建立 message 目錄, 然後新語言包檔:
# messages
- zh.json
- en.json- 1.
- 2.
- 3.
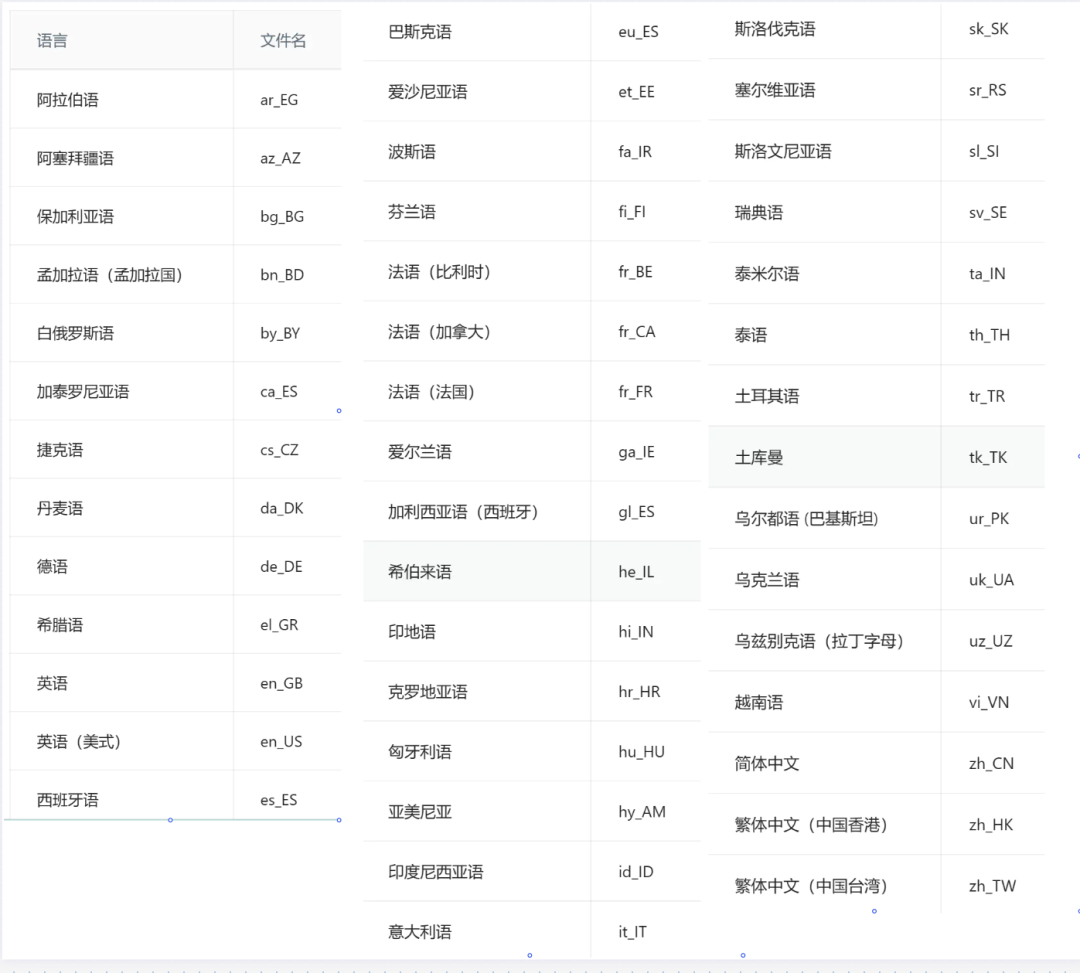
當然如果有其它語言翻譯需求, 也可以加入對應的語言文件,這裡給大家推薦一個語言名稱映射表:
 圖片
圖片
3. 在 src 下新建 i18n.ts 文件,來設定我們的國際化邏輯。
// src/i18n.tsx
import {headers} from 'next/headers';
import {notFound} from 'next/navigation';
import {getRequestConfig} from 'next-intl/server';
import {locales} from './navigation';

export default getRequestConfig(async ({locale}) => {
  // Validate that the incoming `locale` parameter is valid
  if (!locales.includes(locale as any)) notFound();

  const now = headers().get('x-now');
  const timeZone = headers().get('x-time-zone') ?? 'Europe/Vienna';
  const messages = (await import(`../messages/${locale}.json`)).default;

  return {
    now: now ? new Date(now) : undefined,
    timeZone,
    messages,
    defaultTranslationValues: {
      globalString: 'Global string',
      highlight: (chunks) => <strong>{chunks}</strong>
    },
    formats: {
      dateTime: {
        medium: {
          dateStyle: 'medium',
          timeStyle: 'short',
          hour12: false
        }
      }
    },
    onError(error) {
      if (
        error.message ===
        (process.env.NODE_ENV === 'production'
          ? 'MISSING_MESSAGE'
          : 'MISSING_MESSAGE: Could not resolve `missing` in `Index`.')
      ) {
        // Do nothing, this error is triggered on purpose
      } else {
        console.error(JSON.stringify(error.message));
      }
    },
    getMessageFallback({key, namespace}) {
      return (
        '`getMessageFallback` called for ' +
        [namespace, key].filter((part) => part != null).join('.')
      );
    }
  };
});- 1.
- 2.
- 3.
- 4.
- 5.
- 6.
- 7.
- 8.
- 9.
- 10.
- 11.
- 12.
- 13.
- 14.
- 15.
- 16.
- 17.
- 18.
- 19.
- 20.
- 21.
- 22.
- 23.
- 24.
- 25.
- 26.
- 27.
- 28.
- 29.
- 30.
- 31.
- 32.
- 33.
- 34.
- 35.
- 36.
- 37.
- 38.
- 39.
- 40.
- 41.
- 42.
- 43.
- 44.
- 45.
- 46.
- 47.
- 48.
- 49.
- 50.
- 51.
這段邏輯全域配置了國際化載入的路徑,格式化資料的方式,時間等參數,當然還有更多的邏輯處理可以參考 next-intl 文件。
需要補充一下 navigation.tsx 這個文件的內容:
import {
    createLocalizedPathnamesNavigation,
    Pathnames
  } from 'next-intl/navigation';

  export const defaultLocale = 'zh';

  export const locales = ['en', 'zh'] as const;

  export const localePrefix =
    process.env.NEXT_PUBLIC_LOCALE_PREFIX === 'never' ? 'never' : 'as-needed';

  export const pathnames = {
    '/': '/',
    '/user': '/user',
    '/dashboard': '/dashboard',
    // '/nested': {
    //   en: '/next-home',
    //   zh: '/next-zh-home'
    // },
  } satisfies Pathnames<typeof locales>;

  export const {Link, redirect, usePathname, useRouter} =
    createLocalizedPathnamesNavigation({
      locales,
      localePrefix,
      pathnames
});- 1.
- 2.
- 3.
- 4.
- 5.
- 6.
- 7.
- 8.
- 9.
- 10.
- 11.
- 12.
- 13.
- 14.
- 15.
- 16.
- 17.
- 18.
- 19.
- 20.
- 21.
- 22.
- 23.
- 24.
- 25.
- 26.
- 27.
- 28.
上面程式碼定義了國際化的:
- 預設語言和語言列表
- 路由映射
- 國際化路徑前綴
這樣我們後面在封裝國際化切換組件的收就會有很好的 ts提示。
4. 配置 next 國際化中介軟體
我們在 src 目錄下新建 middleware.ts, 內容如下:
import createMiddleware from 'next-intl/middleware';
import {locales, pathnames, localePrefix, defaultLocale} from './navigation';

export default createMiddleware({
  defaultLocale,
  localePrefix,
  pathnames,
  locales,
});

export const config = {
  // Skip all paths that should not be internationalized
  matcher: ['/((?!_next|.*\\..*).*)']
};- 1.
- 2.
- 3.
- 4.
- 5.
- 6.
- 7.
- 8.
- 9.
- 10.
- 11.
- 12.
- 13.
- 14.
這樣國際化方案就初步完成了。接下來我們來具體看看如何在頁面中使用國際化來寫文案。
5. 在元件/ 頁面中使用i18n
next-intl 的國際定義支援命名空間,我們可以在messages 對應的語言檔案中透過嵌套結構來設定命名空間,有序的管理不同頁面的國際化文字:
// zh.json
{
    "index": {
        "title": "Next-Admin",
        "desc": "一款基于NextJS 14.0+ 和 antd5.0 开发的全栈开箱即用的多页面中后台管理解决方案",
        "log": {
            "title": "Next-Admin 进程规划",
            "1": "Next + antd5基础工程方案",
            "2": "国际化语言支持",
            "3": "登录注册 / 数据大盘 / 业务列表页面",
            "4": "图标管理 / 素材管理",
            "5": "思维导图 / 流程图 / 3D可视化页面",
            "6": "页面搭建引擎 / 表单引擎",
            "7": "万维表"
        },
        "try": "立即体验"
    },
    "global": {
        "technological exchanges": "技术交流",
        "dashboard": "数据大盘",
        "customChart": "'自定义报表",
        "monitor": "数据监控",
        "userManage": "用户管理",
        "formEngine": "表单引擎",
        "board": "办公白板",
        "orderList": "订单列表",
        "resource": "资产管理"
    },
    // ...
}- 1.
- 2.
- 3.
- 4.
- 5.
- 6.
- 7.
- 8.
- 9.
- 10.
- 11.
- 12.
- 13.
- 14.
- 15.
- 16.
- 17.
- 18.
- 19.
- 20.
- 21.
- 22.
- 23.
- 24.
- 25.
- 26.
- 27.
- 28.
- 29.
- 30.
這樣我們就可以這樣來使用:
'use client';
import { useTranslations } from 'next-intl';

export default Page(){
  const t = useTranslations('global');

  return <div> { t('technological exchanges') } </div>
}- 1.
- 2.
- 3.
- 4.
- 5.
- 6.
- 7.
- 8.
同樣我們也可以給國際化文案中使用動態變數:
// en.json
{
  "weclome": "Hello {name}!"
}

// page.tsx
t('weclome', {name: 'Next-Admin'}); // "Hello Next-Admin!"- 1.
- 2.
- 3.
- 4.
- 5.
- 6.
- 7.
官方文件中也介紹如何使用數學計算,時間日期格式化等功能, 整體來說還是非常強大的。
6. 注意事項
由於next 專案支援客戶端渲染和服務端渲染,所以使用next-intl 的方式也是有區別的,如果我們在頁面中出現next-intl 相關的服務端渲染報錯, 可以在頁面同級添加layout.tsx,然後做如下封裝:
import { NextIntlClientProvider, useMessages } from 'next-intl';

type Props = {
    children: React.ReactNode;
    params: {locale: string};
};

export default function LocaleLayout({children, params: { locale }}: Props) {
    // Receive messages provided in `i18n.ts`
    const messages = useMessages();

    return <NextIntlClientProvider locale={locale} messages={messages}>
                {children}
            </NextIntlClientProvider>
}- 1.
- 2.
- 3.
- 4.
- 5.
- 6.
- 7.
- 8.
- 9.
- 10.
- 11.
- 12.
- 13.
- 14.
- 15.
這樣就可以解決報錯問題了(本人親自實驗好用)。
同時,這也是基於 nextjs 巢狀佈局實現的方案, 為了使用 next-intl, 我們還需要在next/src/app目錄做如下改造:
next-admin\src\app\[locale]- 1.
也就是加一層[locale] 目錄。
好啦, 透過以上的設定我們就可以開心的使用國際化了,全部程式碼我已經同步到 Next-Admin 倉庫了, 大家可以開箱即用。