Hardware Design for IoT Projects: A Complete Guide

Designing and building IoT hardware is always a pleasure. You can work with hardware designers to create a prototype, run it by stakeholders, and develop an actual, tangible product for your IoT environment.
However, what does this process entail, what are the key considerations, and what should you consider before building the hardware? This article answers all your questions.
Connected devices form the basis of the Internet of Things. From industrial equipment and buildings to freight transport and pipelines, these IoT devices are everywhere, transmitting data and monitoring set metrics. Key examples of IoT devices include pressure sensors in pipes, microchips inserted under the hides of cattle in a herd, and temperature sensors inside refrigerator rail cars.

Both hardware and software components are designed for IoT applications through standard design protocols and ultimately integrated with the communication network. Popular platforms such as the Arduino Uno and Raspberry Pi enable rapid prototyping without involving extensive custom development, speeding up the time required to implement IoT configurations.
You see, design involves identifying performance requirements, necessary hardware and software, and then component specifications that are determined after considering the environment and the applications to be used within it.
Hardware design for IoT projects
In hardware design, everything comes down to a clear understanding of the customer's business needs. You have to consider the smallest component and data specification details and make sure they fit the end goal.
Before designing the hardware for your IoT project, make sure your team has all the answers to the following questions:
- What physical signals must be measured?
- Should the sensor connect to the cloud directly or through a gateway device?
- How often should we collect signals, and how quickly should we exchange data over the network?
Services designed around IoT hardware
Whoever you appoint for your IoT hardware design project should have the ability and experience to develop hardware that is aligned with your core functionality so that you can get the maximum output from your IoT product.
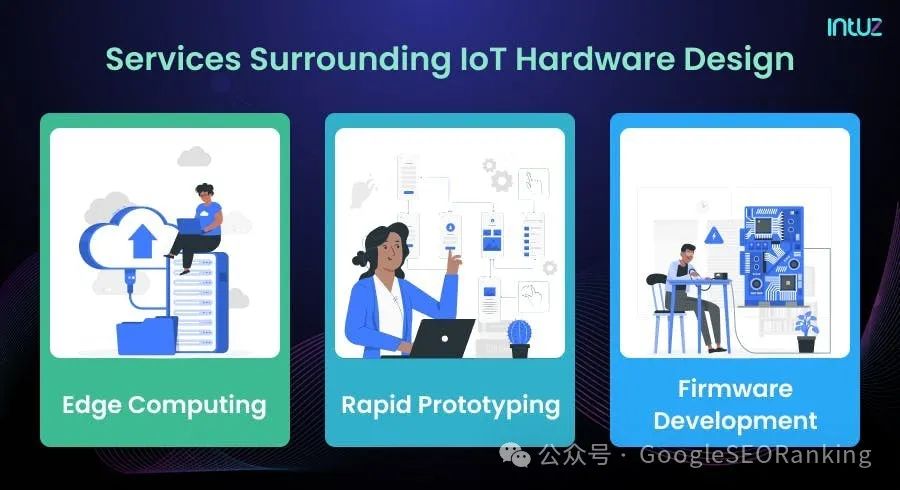
They should be able to address all challenges associated with integrating into existing technology stacks to achieve seamless performance and complete custom IoT hardware designs:
1. Edge computing
Deploy edge computing on IoT devices instead of traditional cloud computing to achieve lower latency rates and faster offload times. Manage access points and save storage space by processing data in real time, rather than collecting all data in the cloud for later analysis.
2. Rapid prototyping
Building market-ready solutions takes time and money. Therefore, it is crucial to ensure that your product design and functionality meet market expectations and requirements.
Whether you're testing whether a new hardware idea works or simply reviewing a business case, prototypes can help you understand what works and what doesn't. Additionally, you can 3D print housings, dashboards, and analytics.
3. Firmware development
Building IoT hardware devices is only one piece of the puzzle. It helps if you have microprocessors and microcontrollers for IoT devices designed, developed and tested based on IoT firmware. Get board support packages, device drivers, network connectivity, and power management to enable connected IoT devices.
Arduino Uno and Raspberry Pi 2 concepts
IoT hardware includes a range of devices such as bridges, sensors, routers, etc. that are responsible for critical tasks such as system activation, detection to support specific targets, and device security and communications.
As mentioned before, IoT hardware components vary from low-power boards to single-board processors (such as the Arduino Uno and Raspberry Pi 2), which are basically smaller boards that plug into the motherboard - thus creating light and Specific features such as thermal sensors, GPS and interactive displays. Arduino Uno is an open source device platform that helps create compatible development boards and tools.
Device capabilities vary between official Arduino models, as well as dozens of third-party compatible boards. The hardware allows IoT developers to program using Python, JavaScript and Lua. The standard way to build software that runs on an Arduino-compatible microcontroller is to use C++, C, and the Arduino IDE.
When you implement low-level hardware features, such as deep sleep mode or reading data from IoT connected devices, you may need to rely on device-specific libraries to make your wireless device portable. The Arduino Uno is a low-cost option that supports Bluetooth and WiFi connectivity, making it a popular solution among IoT application developers.
The Raspberry Pi 2, on the other hand, is one of the most affordable (and commonly used) IoT development boards on the market. A credit card sized mini PC board is available that can also be run as a personal PC. Raspberry Pi 2 offers significant enhancements in memory, speed, and multimedia processing capabilities while retaining power consumption levels and backwards compatibility.
It also works on multiple operating systems, uses a standard keyboard and mouse, and supports Python, Java, and Node.js packages. It has dual-band wireless LAN, Bluetooth, WiFi and Ethernet connectivity. Raspberry Pi 2 is used to configure digital media systems and security cameras.
Additionally, the board can boot directly from a USB-connected pen drive or hard drive - this is one of the Raspberry Pi 2's major USPs.
Ten stages of the hardware development process
Building hardware systems for IoT applications is a daunting task in itself. Although IoT products are made up of software, firmware, and hardware components, 80% of the cost and development headaches come from the latter.
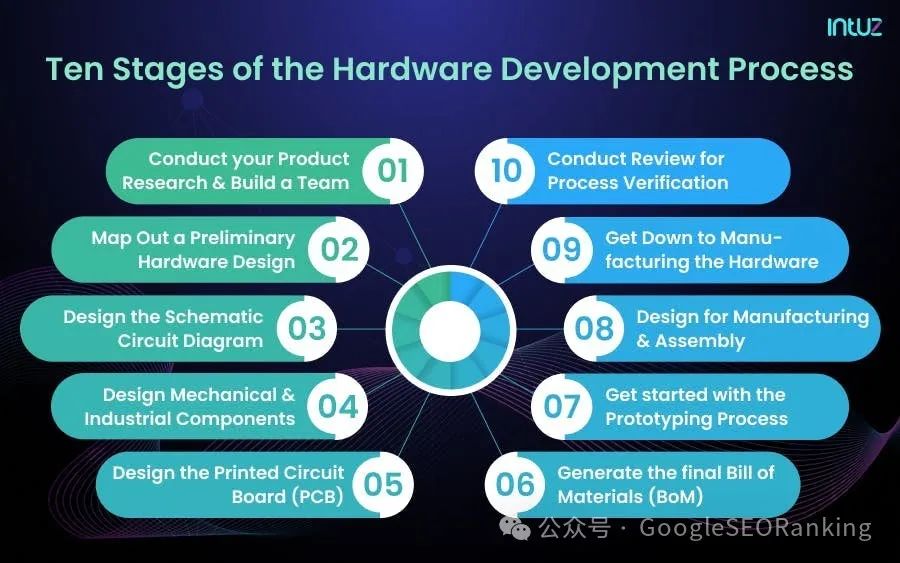
Therefore, you must follow this process diligently and consciously. Don’t worry – we’ll discuss the key ten stages in detail in the following sections:
1. Conduct product research and build a team
First, what are you trying to build? Include all details such as configuration, features, market gaps, target customers, competitive products, etc. Take note of the skills that exist in-house and the knowledge and expertise you must outsource.
Let's say you create a team of solution designers, technical architects, and researchers. To build a minimum viable product (MVP), you must clearly detail development priorities in addition to listing basic product features and expanded functionality.
The more you brainstorm among team members and talk to your target audience, the clearer your understanding of hardware development will become. Research thoroughly and write down your use cases in a datasheet. QA resources are added at this stage to determine the possibility of building test cases for IoT hardware devices.
2. Develop preliminary hardware design
This is necessary to resolve the gap between the design concept and the actual design. Specify all electronic functions and how they interconnect with other functional components.
Microcontrollers are the core component of any hardware product that synchronizes sensors, memory chips, displays, etc. So, choose a microcontroller and then other related components for the hardware development process.
3. Design schematic circuit diagram
A circuit schematic focuses primarily on the high-level functionality of a product, and the diagram enables you to consider the tiniest details and components, such as sensors, microchips, and resistors.
Any mismatch in pin numbers may cause overall product failure. Therefore, the schematic must be designed with great care. Create an independent subcircuit for each module to achieve more efficient output in hardware.
4. Design mechanical and industrial components
Computer-aided design and drafting, or CAD, is a technology that supports design and technical documentation, replacing manual drawing with an automated process. It is used to design machinery and industrial components.
The mechanical design follows all traditional principles to achieve fully compliant output. Choose a CAD tool based on the type of hardware you want to design for and your budget. Next, outline all design activities, including the purpose behind each design. The goal is to determine the value, functionality, and appearance of the hardware design for all components.
5. Design the printed circuit board (PCB)
Here are things you should never forget: Products are smaller, components are more compact, and PCB layouts are more complex to create. If the product offers wireless connectivity, the design will be more complex. Crystal clocks, power routing, address or data lines, etc. make PCBs more complex.
To create a physical board of all electronic components, use verification tools to match the schematic to the conceived PCB flow. Some famous names include Altium Designer, Solidworks PCB, PCB Artist, etc.
6. Generate final bill of materials (BoM)
BoM is a list of all mechanical and electronic items to be procured. Whether it's low-cost or small components, note down their quantity and specifications. Most schematic design software solutions populate the BoM.
Manually verify documents before contacting vendors. Finding a reliable third-party supplier is crucial because you don’t want to source defective or low-quality components. Be sure to choose well. Take the time to talk to as many potential suppliers as possible.
7. Start the prototyping process
Prototyping connects your hardware product to the actual build that will one day hit the market. This is a crucial step as it helps gauge the feasibility of the desired product. In addition to saving time and effort, this ensures that the development process is fast and simple. You can prototype in-house or outsource it to a skilled development agency.
8. Manufacturing and Assembly Design
Also known as DFMA, it simplifies production complexity and keeps overall costs low. DFMA facilitates high-volume manufacturing and minimizes the number of product assembly steps.
Before starting the process, consult with production experts to obtain inputs and analyze each component to control manufacturing costs. Follow all legal manufacturing processes and use all standardized parts to avoid inventory complications.
9. Start making hardware
Once you've completed your home, finalized your prototype, and gained approval from your stakeholders, it's time to start building the hardware. Make sure you find a reliable manufacturing partner for the job.
At this stage you also need to identify and resolve any remaining issues in the design, as well as fix assembly fixtures and errors. This step takes the longest to complete.
10. Conduct process validation review
Once you have tried and tested the production of 100 units in the previous stage, you can invest more and produce 100-200 units. Perform multiple build tests to evaluate whether your workflow is ready for mass production. You may still encounter some failures along the way. Rather than panic, use this opportunity to identify and resolve any issues.
Three IoT Hardware Building Blocks
Due to the plethora of IoT applications, it is impossible to generalize the hardware architecture. However, this shouldn't stop you from following the framework. Every IoT application consists of three standard “building blocks”:
1. Data collection module
It focuses on taking physical signals from "things" or "IoT assets" and converting them into digital signals that computers can manipulate. This hardware component includes different types of sensors such as motion, vibration, temperature, light, etc.
The signals received from the sensors are converted into digital information in the computer for use. Key factors to consider in a data acquisition model include the number and type of sensors that need to be measured and the accuracy of the measurements.
2. Data processing module
This is the “computer” that processes data acquired from IoT assets, stores data locally, performs regional analysis, and performs any other computer operations at the edge. This arrangement does not require you to be an expert in computer architecture.
Your role should be to understand the overall product goals and ask the right questions to help guide your team. The main considerations for this module are processing power and the amount of local data storage.
The decisions you make here should be directly related to functionality, performance, device size, life cycle, etc.
3. Communication module
This refers to the circuitry that is able to communicate with the cloud solution. The model may include communication ports such as CAN, USB and Modbus as well as radio technologies for wireless communications including LoRA, 3G, 5G, ZigBee and WiFi.
The communication module is included in the same device as the other modules, or it can be a separate device dedicated to communication.
How to choose the best design for your IoT project: A guide to hardware design
IoT devices are highly specialized and unique. They are designed to operate in niche environments. Of course, hardware options will also reflect the uniqueness of your IoT device. So, what are the main hardware requirements in the IoT development process? What points must be remembered? Let’s find out:
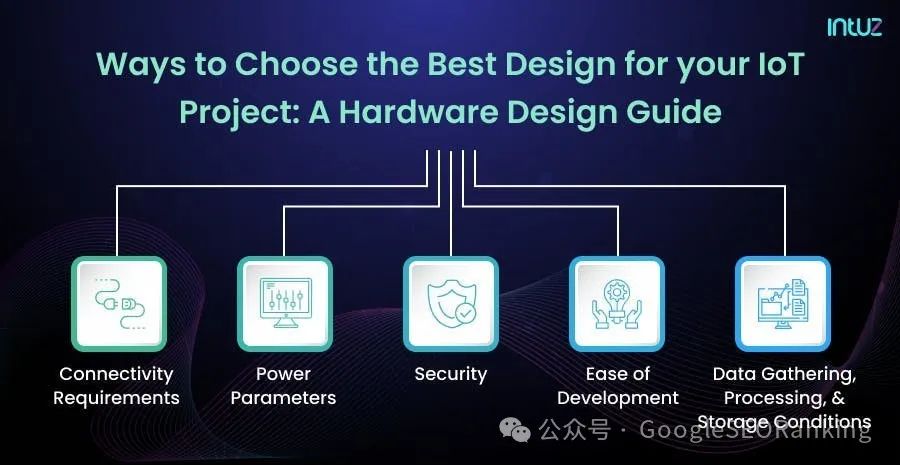
1. Security
Obviously, your IoT devices need to be the most secure devices on the planet. Therefore, maintaining device data integrity and security is critical even during the prototyping process. Security parameters apply to relevant IoT devices, your communications network, mobile and web service applications, and the cloud.
2. Power parameters
Consider whether your device needs to be hardwired for power, or if it needs a portable power source such as a battery. If batteries are required, note their size, weight, and capacity requirements. Also, if it's a "rechargeable" type of battery, know how often it should be charged.
3. Easy to develop
At the end of the day, you want your IoT devices to be up and running quickly - without any hassle. It should capture data, communicate with other connected devices on the cloud, and be the best product for end customers to use. If creating an IoT hardware design is painful, that's a problem.
4. Connection requirements
This is about wireless networking. How far do you want your digital signal to travel? How much data do you want to transfer and at what rate? Consider "fault tolerance" options. Your hardware may need to be upgraded to provide more flexibility in reconnecting data.
5. Data collection, processing and storage conditions
The number of sensors connected to an IoT device, the resolution of the data captured by the connected system, and the rate at which the collected data is sampled are important components of data processing. The amount of data stored on a device depends on how often the device connects to upstream to transfer data.
Summarize
Every IoT application is different. There is no “one size fits all” approach to hardware selection (or development) for an IoT project. Therefore, adopting standards-based commodity hardware such as single board computers and microcontrollers can save you time and money resources in the early stages of the development process.